3. Photographing the night sky: Shooting
Setup your gear
Mount the camera on the tripod, attach the remote shutter if you have one
Camera setup
- Manual mode
- Raw output
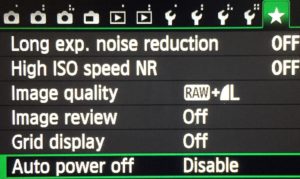
- Turn off all noise reduction settings
Focus
- point to a bright star, the brightest in the sky possibly, avoid planets if you can identify them
- Set ISO to max allowed value
- Setup shutter speed to bulb or to the lowest speed available
- Turn on Live View
- If you are far from focus, it is likely you won’t see any star: LCD is black. In this case make a test shoot with shutter speed 2-3 seconds to help you finding it on the LCD screen
- Focus using Live view: try to get the smallest size possible for the star.
- Hint: perfect focus means not loosing any light from faint stars, so the closer you are to it the more stars you should see
Prepare the camera for shooting
- point it to the sky portion you want to shoot (as for focus, make test shoots)
- Set ISO 1-2 steps below camera maximum
Setting the Shutter Speed
- make test shoots to setup the lowest speed (max amount of time) for the stars not to trail; Rule of thumb is 600/(full frame focal length).
- Watch out! this is easy to overestimate and then you’ll find micro trails when looking at the pictures from a computer screen
- Is the correct exposure? look at the histogram: if it peaks over 30-50% of the range reduce the ISO, do not change shutter speed to fix exposure
Go! Shoot the “Light Frames”
Take as many pictures as you can (for example: 50 or 100, examples of the first post have 30 and 350 frames respectively), beware that after 10-20 minutes you might have to reframe because stars move and your camera is steady. These will be your “Light Frames”
Shoot the “Dark Frames”
Put the lens cap on (yes, your pictures will be “almost” dark) and shoot another set of pictures, how many? ¼-1/3 of Light frames are far enough (it is useless to take more than 30 frames)
Shoot the “Bias/offset frames”
With lens cap on, setup shutter speed to fastest (shortest time, usually 1/4000s); how many? as for darks
Finally: preparing for post processing
You’re ready for post processing: save your pictures on a computer organizing them into different folders, conventional names are LIGHT, DARK and BIAS

